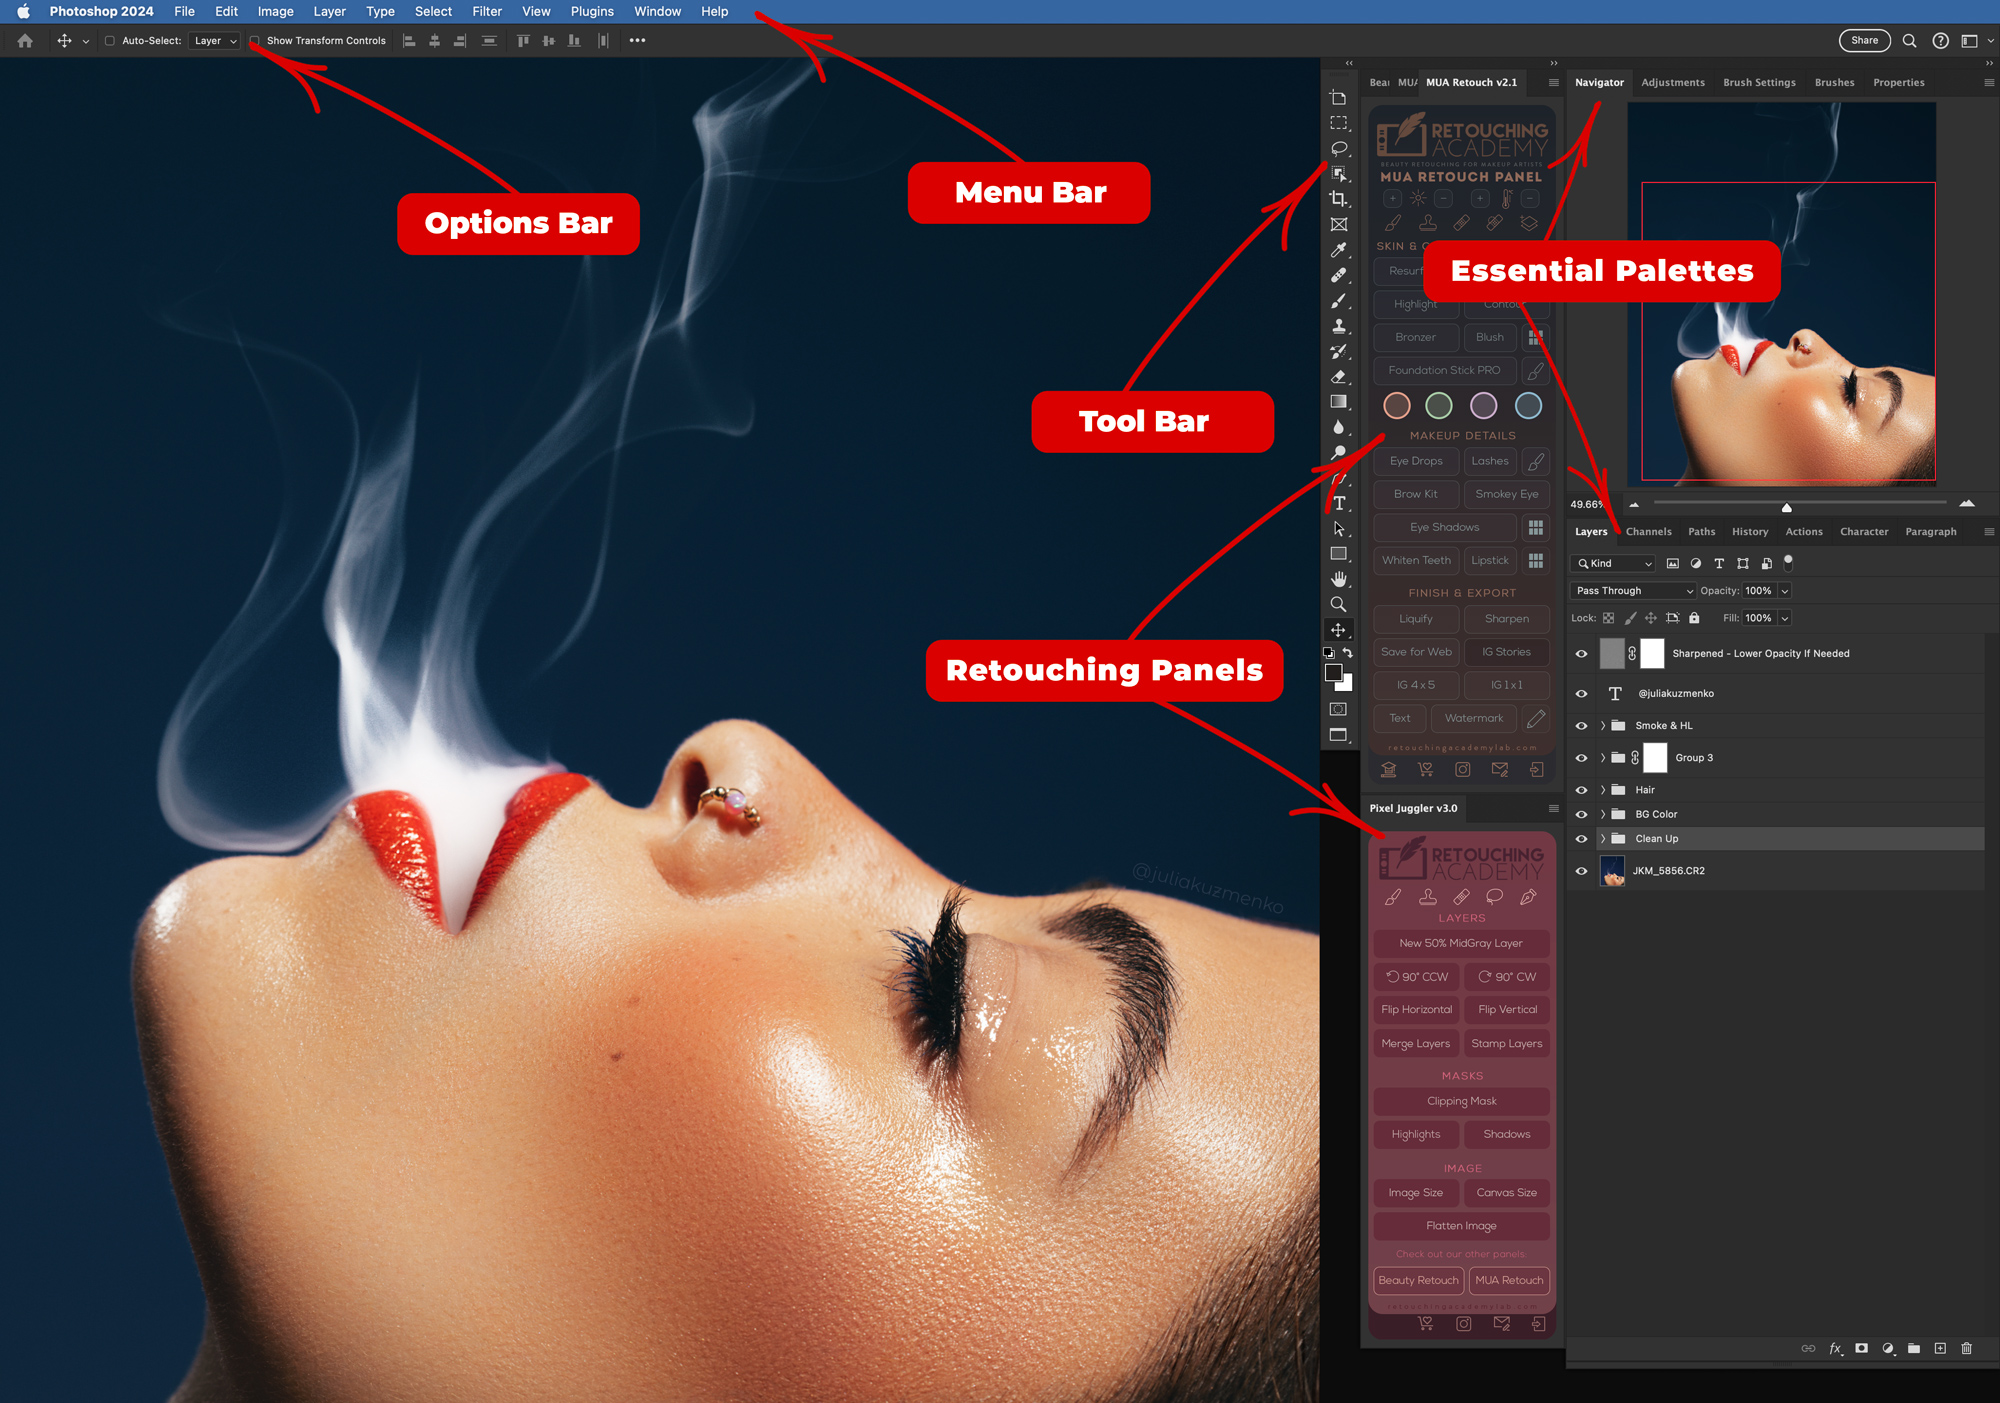
Photoshop Essential Panels for Beauty Retouching
Photoshop essential palettes are a powerful tool for content creators. They are one of the core aspects of navigating Photoshop efficiently.
To customize your Photoshop workspace, select palettes via the “Window” menu in the top menu bar. Toggle different palettes like “Layers,” “History,” or “Channels” on or off by clicking their titles.
A checkmark next to a palette name indicates it’s open and should be visible in your workspace.
Photoshop Essential Palettes
Palettes in Photoshop are used to modify and monitor images, giving you control over virtually every aspect of your workflow. Different types of Photoshop workflows require different sets of palettes to be visible for convenience.
Here are the key palettes for a retouching workflow you should know. You can add other palettes, but these will always be your base:
Navigator
The Navigator palette is a handy tool for quickly changing your view of the image you are working on. Its a thumbnail display allowing a quick transition when working on detailed parts of large images. You can use the slider to zoom in and out or click and drag within the thumbnail to move to different areas of the image.
Adjustments
The Adjustments palette provides quick access to a range of tools that adjust the color and luminosity of your images. Common adjustments include Levels, Curves, Hue/Saturation, Selective Color and more.
Each Adjustment opens in its own layer, allowing non-destructive editing of the image.
Properties
The Properties palette is dynamic and changes based on what is currently selected in the workspace. When you select an Adjustment layer, it displays options relevant to that adjustment, like exposure settings for an Exposure adjustment layer, or color settings for a Hue/Saturation adjustment layer.
Layers
The Layers palette is arguably the most crucial component of Photoshop. It allows you to manage and manipulate individual layers within a document. Each layer can contain pixels (images), text, smart filters or effects (Adjustment layers), and can be edited independently without affecting other layers. This palette lets you adjust the opacity, blending mode, and visibility of layers, and organize them into groups for proper PSD stack management.
Manage layers and layer groups via Adobe
History
The History palette is a powerful feature that records each step you take in Photoshop. This allows you to undo and redo your action steps efficiently. It’s an invaluable tool for experimenting with different effects without committing to changes permanently.
Each history state can be clicked to revert the image to that stage of editing.
Each palette offers specific functions that are essential for detailed professional work in Photoshop, making them invaluable tools for anyone from amateur photographers to professional graphic designers. Familiarity with these elements is a the first step in learning retouching.


