CUSTOM BRUSHES & ACTIONS
Manual Placement
Got Questions? Visit RA Panels Knowledge Base
After you have installed and activated your MUA Retouch UXP panel, and in case the installation script for the additional features did not work for you, please install our custom Brushes and Tool Presets manually by following the steps below.
Important! Please restart Photoshop before activating custom Brushes and Tool Presets.
Step 1: Locate the Tools Folder
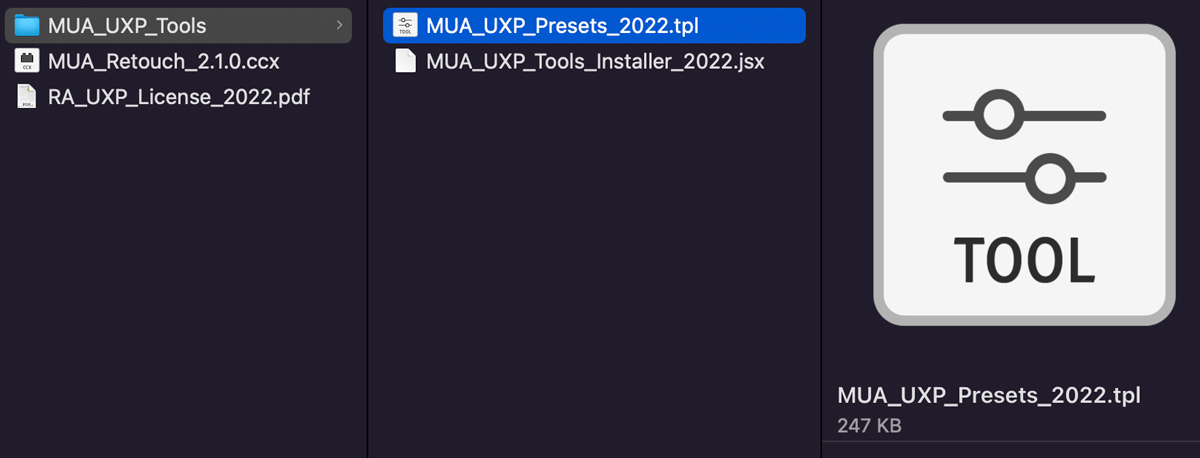
Inside the downloaded and unzipped installation package, locate the MUA_UXP_Tools folder.
This folder contains our custom Tool Presets file necessary for your UXP panel: MUA_UXP_Presets_2022.tpl
Your installation package folder will contain different file and folder names depending on the type of the panel you have purchased.
Step 2: Manually Place the Files
If you are unable to place anything into the folder mentioned below, you might have to change the folder permissions following the instructions in the Error #2 section of this page.
1. Open an additional Finder window and navigate to the following folder on your computer:
![]() ~/Applications/Adobe Photoshop <version>/Presets/Tools
~/Applications/Adobe Photoshop <version>/Presets/Tools
![]() C:Program FilesAdobeAdobe Photoshop <version>Presets/Tools
C:Program FilesAdobeAdobe Photoshop <version>Presets/Tools
2. Copy and paste the MUA_UXP_Presets_2022.tpl file into the Tools folder.
5. Double click the added file inside the Tools folders to have the presets added to Photoshop, or import it as described here.
6. Relaunch Photoshop.
Step 3: Activate Tool Presets
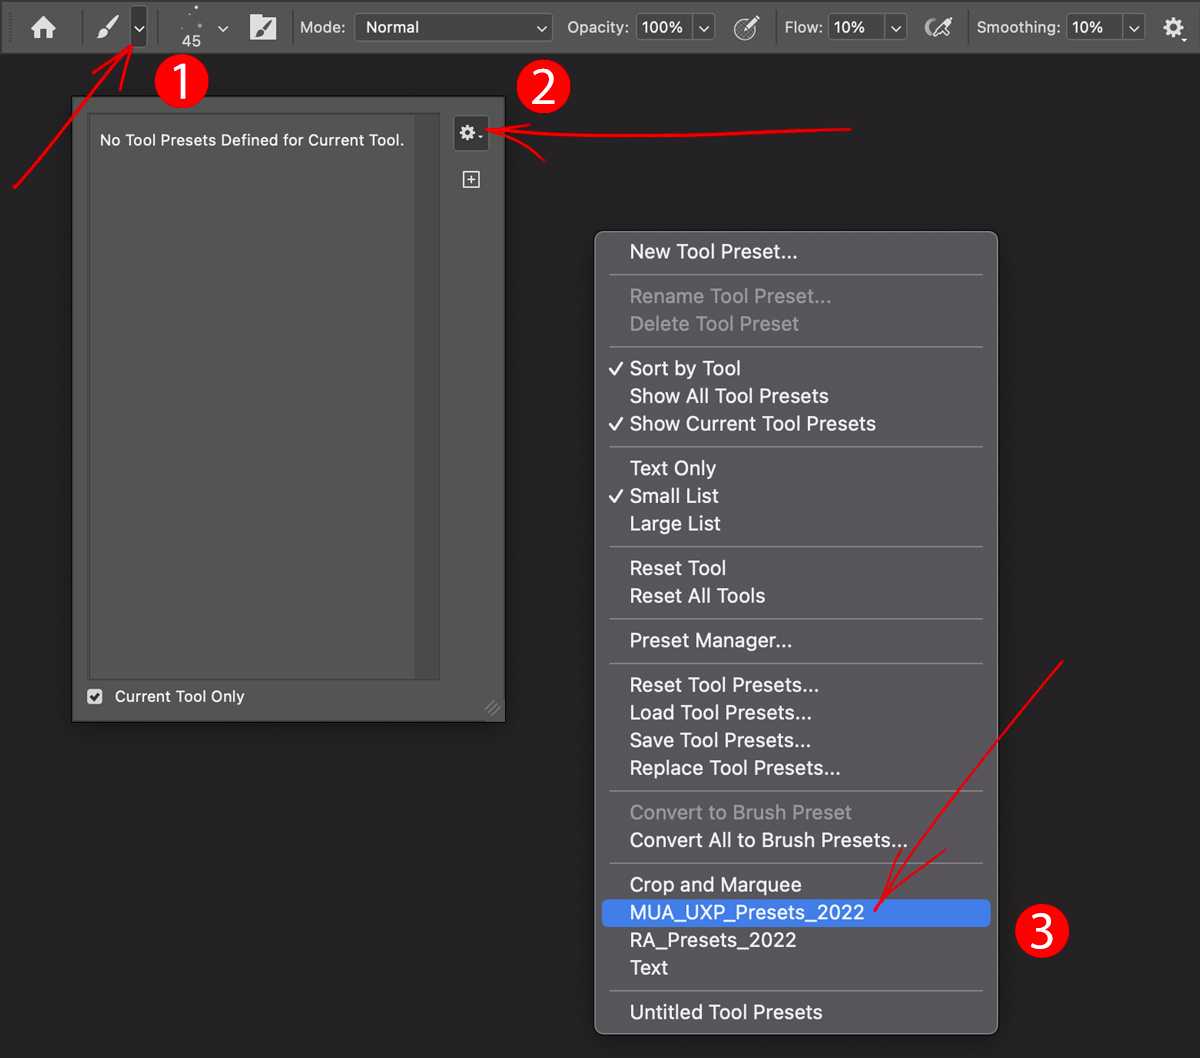
- In Photoshop, open the Tool Presets panel via Window > Tool Presets, or open the Tool Preset dialog window by clicking on the Tool Preset Picker icon in your Options Bar as pictured in the screenshot 👉
- Click on the Panel Options icon in the upper right corner of the panel and select MUA_UXP_Presets_2022 in the list of presets as shown in the screenshot;
- Select Append, to add these Tool Presets to your existing ones;
- If asked, please select Load as Tools;
- As a result, you will see the following Tool Presets appear in the Tool Preset Picker for the Brush tool:
- Brow & Lash Brush – Long
- Brow & Lash Brush – Short
- MUA RA 10px Opacity 100 Flow 1
That’s all, you are good to go 😊
Happy Retouching!